There's an amazing site that has three pages of Space Marine banners, all of which are tiny and detailed- WH40K: Banners & Badges- I found the site inspiring.
You can also find sites explaining how to use a painting program and high quality printer and plenty of tips about scanning images and sizing them properly before printing.
Battlereporter, here on Blogspot, has a good assortment of fantasy banner bases.
Games Workshop includes printables of their own- here's the link for a black and white Skaven banner.
Here's an article on cardstock banners that has sizing tips that may assist you with my methods also. As you can see, if you have the artistic skill, the result is amazing (I realize that the author says you just color between the lines, but I also realize that there are those who find this daunting at such a scale.
So, how do I make banners quickly and easily? There are a few answers to this question- stickers, transfers, and shrink plastic (yes, like "Shrinky Dinks"). When use each and what do the results look like?
Regardless, you'll need to know what you want the finished banner to look like.
Here's the print out used for this article:
 |
| Ultramarine images and one Dark Angels image; unpainted Space Marine figure for scale. |
Now, to review the methods and reasons to select them.
Let's start with some bits:

Method and Situation 1 :
If you have an empty, blank, plastic banner,and you just want some detail, try transfers.
 |
| I'm sure you've got some if you play 40K- they seem to come in most kits- a nice sheet with large selection. |
 |
| Prime the banner in the background color of your choice. May take two coats. |
 |
| As per instructions on the back of the transfer sheet, cut, soak, and apply the transfer(s). |
| Here's the banner, with some splotches of red paint and three transfers... If I cared to take the time, I'd have centered the Blood Angels winged droplet, but all I'd add for a quick banner is a company number. |
Method and Situation 2:
If you have a blank teeny plastic banner and you want tons of detail, my suggestion is to make yourself a sticker. It will be re-positionable, unlike paper on super glue.
There are a few options, but this is my favorite, as it can turn tons of things into stickers (good for things like personalized envelopes, gift tags and the like). Here is the XYRON product home. There are multiple sticker-creating options within this company, but for $15 or less you can make something like 100 stickers. (Refills are usually around $6, but many craft stores offer sales and coupons regularly for scrap-booking products, usually including these; try Michaels, AC Moore, or Jo-AnnFabrics.)
 |
| Print out an image- the neat thing is that you can use a thumbnail- of the banner you would like to make. You may want to use MSWord for the ruler along the frame of the window to make sure that the image is the size you want. Cut out the banner image without leaving any white around the edges. |
 |
| All you do is drop the cut-out into the space between the rolls... |
 |
| Pull the tape to apply the adhesive... |
 |
| Rub to smooth out the image and ensure even coverage. (This is true for a number of sheet products available as well.) |
 |
| Peal and stick! Here's the sticker on the Space Marine we used for scale above. Since the sticker is paper, it bends along the plastic frame. Use a clear lacquer or even a layer of decoupage glue to seal the banner, and you're done! |
Method 3, situations three, four, and five:
Shrink plastic.
 |
| This brand, "Grafix," has several types, including one that can be used in a home printer. (When using the printer, the image should be 50% larger than the finished size.) |
Situation 3-
You would like to have a large banner that you will attach to a sprue for your standard bearer. You can create a banner as tall as your Space Marine (or knight) by sizing the pre-shrunk image at about double the dimensions of the finished product.
 |
| Here are some Dark Angels banners that we made some time back; my husband is modifying them for his Ravenwing bikes, but originally one was held by a Marine in terminator armor, the other by a Watcher. |
 |
| With long strokes if you wish to mimic the folds of cloth, paint a background. |
 |
| Add any details you'd want to be part of the fabric- I added a Roman Numeral X. Cut out the background and bake in the oven according to manufacturer's instructions (usually on parchment, around 300 degrees F for no more than two minutes and as little as 30 seconds depending on the plastic being used). |
 |
| Paint whichever bit (or bits) you wish to include and adhere with super glue- that's it! |
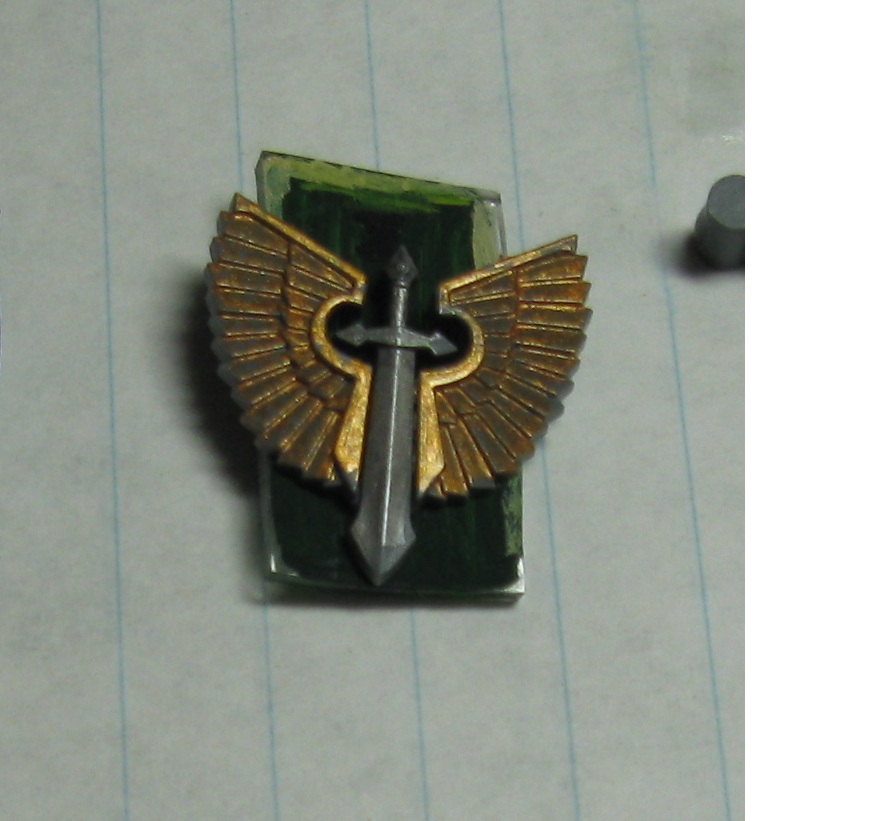
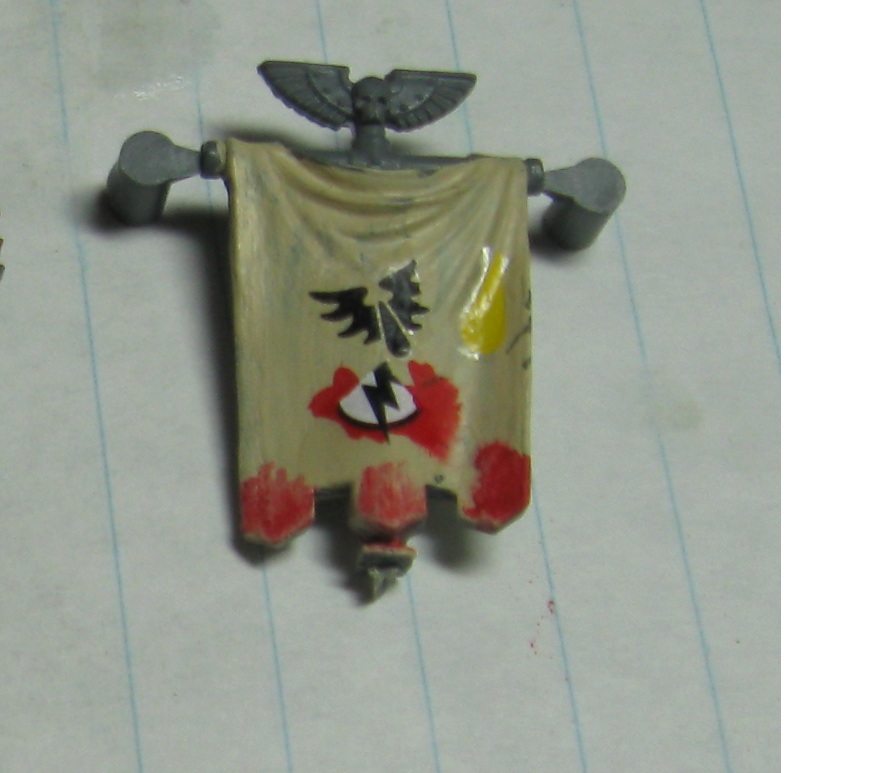
Situation 5- You want a small, detailed, and strong banner for a tank, dreadnought, the back of an armored figure...
 |
| I like to lay the plastic over an existing image and try for a paint-by-number effect. Since the plastic will shrink, it doesn't have to be perfect. If you're worried about getting lettering accurate, try a gel pen over a painted surface. |
 |
| Carefully cut out the plastic- as you can see, the entire under image was covered by paint. |
|
| Bake- these curl up as they shrink, so keep them away from one another and consider placing parchment on top or quickly pulling them out of the oven to modify with pliers. You may want to bake a test piece first. |
 | ||
| A failed attempt at enlarging a photo of the shrunk banner... I still posted it because I think that it is possible to see the level of detail against the scale of the paper (lines are 1 cm apart). |
That's it! Five situations and three methods for making your wargame flags and banners.
 |
| Range of banners with flag-bearing Space Marine for scale. |
 |
| The samples created for this article. |
I truly like to reading your post. Thank you so much for taking the time to share such a nice information. I'll definitely add this great post in my article section. bulk yard signs
ReplyDelete